What Makes a Fire Pit Smokeless?
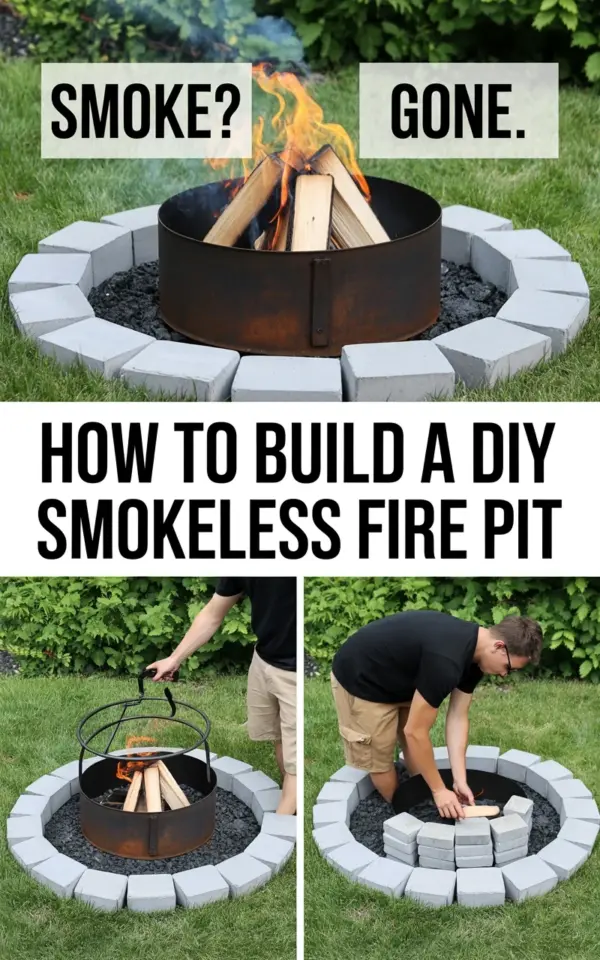
If you have ever sat around a regular campfire, you know the problem. Smoke follows you no matter where you move. That is why I wanted to build my own DIY smokeless fire pit. The photo guide above shows it perfectly: on the top left panel you see the word “SMOKE?” and on the top right panel it says “GONE.” That is exactly the promise of a smokeless design.
The secret is a double wall. You build an inner ring and an outer ring with a gap between them. Air gets drawn into that gap from the bottom, heats up, and shoots out through small holes near the top rim. This secondary air burns the smoke particles before they can float up into your face. No fancy gadgets are needed, just a simple mechanical trick that turns a smoky fire into a clean burn.
Tools and Materials for Your Fire Pit Construction
Before you start, gather everything. I found that having all parts ready makes the Fire Pit Construction much smoother. Here is a straightforward list based on the guide shown in the bottom panels.
- A black metal fire pit ring (the one in the photo is standard, around 24 to 30 inches wide)
- A larger steel ring or a metal drum (for the outer wall, about 6 inches wider than the inner ring)
- Angle grinder with cutting and grinding discs
- Drill with a metal bit (1/2 inch or 3/4 inch works well)
- Marker, tape measure, and safety glasses
- Welding equipment or heavy-duty bolts for assembly (welding gives a cleaner look)
- A shovel for digging the base
- Gravel and sand for drainage
You can buy a pre-made inner ring at a hardware store or repurpose an old steel wheel rim. The outer wall can be a large steel pipe or a cut-down 55-gallon drum. Just make sure the metal is thick enough to handle high heat.
Step 1: Choose the Right Location for Your Backyard DIY
Your Backyard DIY project starts with placement. Pick a flat area at least 10 feet away from your house, fences, or any dry brush. The ground should be dirt or gravel, not wood decking. I learned this the hard way after a spark landed on a dry board.
Dig a shallow bowl about 6 inches deep and fill it with gravel. Then add a layer of sand on top. This creates a stable and fireproof base. The bottom left panel of the photo shows the metal ring sitting in a prepared spot. Do not skip this step. A solid base prevents the fire pit from tipping and helps with drainage when it rains.
Step 2: Build the Double-Wall Structure for Smokeless Fire Pit Design
Now we get to the core of the Smokeless Fire Pit design. Place your smaller inner ring in the center. Around it, position the larger outer ring. The gap between them should be about two to three inches. Mark the height so both rings are level.
Next, drill a row of small holes around the bottom of the outer ring. These are the intake holes. Then drill a second row of holes near the top of the inner ring, just below the rim. The heat from the fire creates a natural vacuum: cool air enters the bottom holes, travels up the gap, and jets out through the top holes. That blast of hot air burns the smoke. In the photo guide, the middle panel says “HOW TO BUILD A DIY SMOKELESS FIRE PIT” because this airflow concept is the heart of the build.
Attach the two rings together using small metal spacers. You can weld them or bolt them. Weld a few short rods between the rings every 12 inches. That keeps the gap consistent. If you cannot weld, try heavy-duty metal brackets and bolts.
Step 3: Install the Fire Pit Ring and Add Airflow Control
The bottom left panel of the photo shows a black metal fire pit ring. That ring becomes the top rim of your fire pit. It doubles as a cooking grate support if you want to grill later. Set it on top of the inner ring so it rests securely.
For extra control, you can create a small door on the outer ring near the bottom intake holes. Cut a rectangle, hinge it, and add a latch. When you open it, more air rushes in and the fire burns hotter with less smoke. When you close it, the fire slows down. This simple tweak is optional but helpful if you plan to use the pit for both quick fires and long roasting sessions.
Step 4: Test Your Build and Adjust for a Clean Burn
Once everything is assembled, stack a small pile of dry kindling inside. Light it and watch the smoke behavior. With a well-built double wall, you will notice very little smoke rising above the rim. Instead, the smoke gets sucked down into the gap and re-burned. The top right panel of the photo says “GONE.” for a reason, it really works.
If you still see smoke, check for air leaks. The gap between the rings must be sealed at the bottom (except for the intake holes). Any crack can break the vacuum. Also, use only seasoned hardwood. Wet or green wood creates extra smoke that overwhelms the system. A clean burn depends on both the pit design and the fuel you feed it.
Practical Tips for Maintaining Your Outdoor Fire Pit
Your new Outdoor Fire Pit will last years if you take care of it. After each use, let the ashes cool completely. Remove them and check for rust spots. A coat of high-heat paint once a season protects the metal. I repaint mine every spring before the first campout.
Store a cover over the pit when not in use. Rain and snow will accelerate rust, especially around the drilled holes. If you live in a humid area, consider using stainless steel for the outer ring. It costs more but lasts longer.
One more tip: keep a metal grate or mesh screen nearby. You can drop it on top to contain sparks and still let the smokeless airflow work. This is especially important if you have kids or pets running around.
Why This Method Beats Store-Bought Smokeless Pits
I have used both. A store-bought smokeless fire pit can cost hundreds of dollars. This DIY version costs less than fifty bucks if you use scrap metal. And the performance is nearly identical. The key is the same double-wall air injection system. You get that satisfying roar of a hot fire without the tears and coughing.
The four-panel guide in the photo tells the whole story in a glance: smoke on one side, gone on the other, and a simple path to get there. That is exactly what you are building. No complicated engineering degree required.
So grab your tools, find a weekend afternoon, and give this project a try. You will end up with a cozy backyard spot where you can actually enjoy the fire without smelling like a campfire for the next three days. If you have questions during the build, leave a comment below. I check regularly and I love hearing about other people’s success stories.
#DIYFirePit #SmokelessFirePit #FirePitConstruction #BackyardDIY #OutdoorFirePit
Leave a Comment