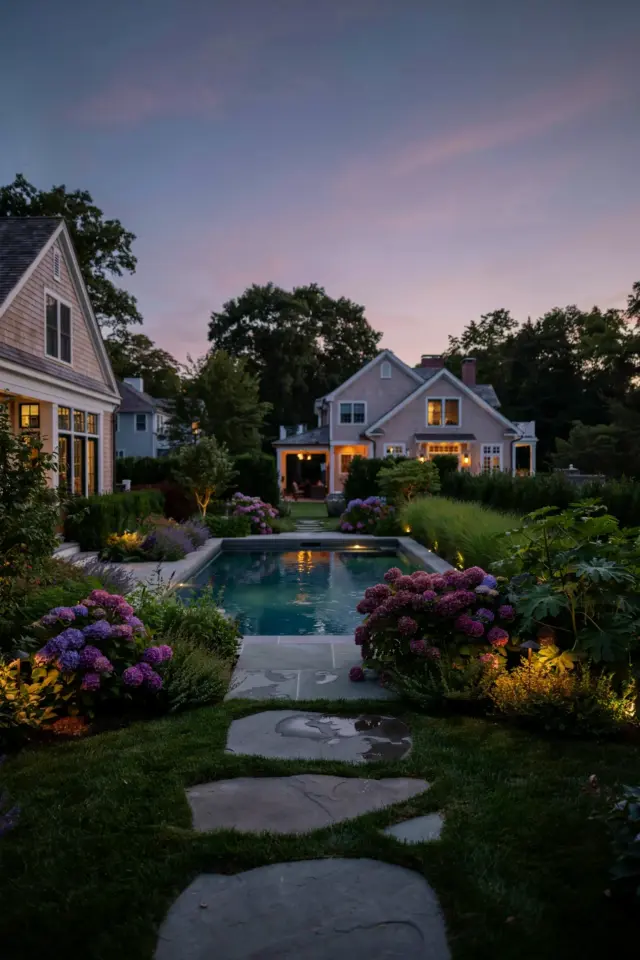
There’s a version of me that loves the idea of a perfect, pristine garden path, all sharp edges and immaculate gravel. And then there’s the version of me that actually has to weed, rake, and haul stuff through the backyard every single weekend. That version wins. The best garden paths and walkways aren’t just about getting from point A to point B; they’re about making the journey feel like a tiny vacation. You want something that looks like it belongs, something that gets better with age and doesn’t fight you every step of the way.
I’ve spent way too many hours scrolling through landscape design forums and staring at my own patchy grass, and I have some strong opinions. Honestly, a walkway can make or break the entire vibe of your outdoor space. So, if you’re looking for that lived-in, inviting feel, let’s get into the nitty-gritty of how to actually build that cozy escape. We’ll cover everything from the planning phase to the final touches, and I’ll share the lessons I learned the hard way so you don’t have to.
Step One: Stop and Map Out Your Traffic Flow
Before you get seduced by pretty pictures of flagstone, you need to think about how you actually move through your yard. That gorgeous, winding trail looks amazing in a magazine, but if it adds ten minutes to the walk from your patio to the grill, you’ll end up hating it. I did. My first path was a beautiful curve that led nowhere useful, and let me tell you, watching guests walk on the grass to bypass it was a real ego check. So, grab a hose or a rope and lay out the *general* shape on the ground first. Live with it for a few days.
You need to consider the “desire lines,” which is a fancy way of saying the direct route people naturally take. If your path is the only way to get to your backyard landscaping focal point, like a fire pit or a pool, make it functional first. A slightly curved path is awesome for slowing things down and creating a sense of discovery, but a series of sharp, pointless zigzags will just get on everyone’s nerves. Use the hose trick to test the width too. Make sure it’s wide enough for two people to walk side-by-side comfortably, at least four feet, otherwise, it will feel like a lonely one-way street.
Stepping Stones and Flagstone: The Pillars of a Cozy Garden Path
Ok so, if you want that instantly inviting, cottage-core aesthetic, nothing beats natural stone. Stepping stones set into a bed of soft ground cover or mulch are my absolute favorite because they look like they’ve been there forever. The trick is to space them according to the natural length of a human stride, about 24 to 30 inches apart from center to center. If you space them too far apart, you’ll be doing an awkward little hop-skip, which is fine if you’re a goat, but not great for carrying a tray of drinks.
For a bigger, more substantial walkway idea, flagstone is the way to go. It’s irregular, it has character, and no two pieces are the same. You can lay it in a “dry laid” style over sand, which is easier to adjust later, or set it in concrete for a more permanent structure. I personally love the look of irregular flagstone with creeping thyme planted in the gaps. It smells incredible when you walk on it, and it softens the harsh edges of the stone. Just don’t make the mistake of using perfectly square, uniform pavers unless you’re going for a very modern, structured look. In a cozy garden, you want a little chaos.
Walkway Materials That Beg You to Walk Barefoot
Let’s talk about texture, because it’s the unsung hero of cozy design. Concrete might be durable, but let’s be real, it’s a bit cold and institutional. Here’s the thing: if you have a pool, the material you choose is critical for both comfort and safety. Smooth, polished stone can become a slip-and-slide hazard, and dark materials can burn your feet in the summer sun. You want something with a bit of grip.
Have you considered peastone gravel? It’s a classic for a reason. It has a lovely, soft crunch underfoot, it drains well, and it’s forgiving on bare feet. I used it around my own small pool, and it solved the “muddy grass” problem instantly. The only downside is that it needs edging to stay put, and you’ll have to rake it occasionally to keep it even. But the sound of it, that crackling noise, honestly makes me feel like I’m on vacation in my own backyard. Loose gravel is not the best idea on steep slopes, but on flat ground, it’s a dream. For a more structured feel, you can combine it with large, flat pavers to create a patterned walkway.
Garden Path Edging: The Border That Keeps Everything Honest
This is the part nobody talks about, but it’s what separates a pro-looking path from a mess. Edging isn’t just about looks, (though a neat border does look great), it’s about function. It keeps your gravel where it belongs, stops grass from creeping into your flower beds, and gives the whole design a clean line. You can use so many things: steel edging is sleek and modern, brick is classic and durable, and natural log rolls or stones feel rustic and woodsy.
I went with a simple, low brick border for my walkway ideas, and it was a game-changer. The bricks are set flat, slightly below the level of the gravel, so the lawn mower can actually drive right over them. Why is that important? Because trimming grass along a curved bed is a miserable chore that I deeply despise. It took a whole weekend to dig the trench and set the bricks, but it saves me about twenty minutes of swearing every single week. That’s a fair trade. Honestly, think about your future self when you’re laying this out. Future you will thank you for not having to edge with a weed whacker on your hands and knees.
Curving Walkway Ideas and the Power of the “Threshold”
If you want your backyard landscaping to feel like a real escape, create a threshold. This is that moment where you transition from the main lawn into the garden proper, and it can be as simple as an arbor or as subtle as a single large tree stump that acts as a side table. I read somewhere that a path should “invite, not announce,” and that stuck with me. You don’t want a straight shot that reveals the whole yard at once. You want a path that winds gently behind a shrub, or one that dips slightly to avoid a large tree. It creates this curiosity, this small pull to go see what’s on the other side.
One of my favorite walkway ideas is building a path that connects two “rooms” of the backyard. For example, have a path lead from the patio, through a small shaded nook, and then open up onto the sunny pool deck. It breaks up the monotony of one giant open space and makes the backyard feel much larger than it actually is. Use a mix of materials here, like stone steps leading down to a gravel path, to visually separate these zones. It’s a simple trick that makes a standard yard feel like a luxury resort.
Lighting and Soft Details for a Cozy Backyard Vibe
A path that looks great during the day might disappear entirely at night, which is dangerous and sad. You need lighting, but not that harsh floodlight stuff. We want welcoming, practical lighting that casts soft shadows. Low-voltage path lights are the standard choice, but don’t forget the power of the humble solar stake light. They are ridiculously easy to install (you literally stick them in the ground), and the newer ones are actually pretty bright, not gonna lie. The key is to light the edges of the path, not the path itself. It outlines the route without looking like a runway.
In addition to lighting, think about the plants that line the path. This is where the “cozy” really comes from. Mounding, trailing plants that spill over the edges of the stone soften the hardscape and make it look established. I love using creeping jenny or sedum in the cracks, and hostas or ferns for a lush backdrop. Don’t be afraid to let the plants brush against your legs as you walk by. That tactile sensation is part of the charm. Add a few fragrant herbs like lavender or mint along the edges, and you’ll have a sensory experience with every stroll.
Putting It All Together in Your Own Backyard
Look, you don’t need to rip out your entire yard and hire a landscaping crew to get this right. Start small. Pick a single path that connects your patio to your garden gate and focus on that. Use materials that fit your style and your budget. Mulch is cheap and smells great, but it washes away in heavy rain and needs topping up every year. Stone is pricier and heavier to haul, but it lasts forever. Ditch the idea that it has to be perfect and accept that it’s going to be a little rough around the edges. That’s what makes it cozy.
I know I threw a lot of specifics around, but here’s the simple breakdown of what to do next:
- Use a garden hose to mock up the path and walk it daily for a week before you dig.
- Dig out at least 4 to 6 inches of soil to lay a proper base, it saves you from a sinking path later.
- Choose a main material (like flagstone or peastone) and a border material (like brick or logs).
- Plant creeping ground covers in the gaps to soften edges and reduce weeding.
- Add low, warm-toned lighting that guides the eye, not blinds it.
Take the pressure off and just enjoy the process. Get your hands dirty, move some rocks around, and make it your own. The best walkway ideas aren’t the ones that are perfectly manicured, they’re the ones that invite you to slow down. Wondering where to source a specific type of stone? Chat up your local nursery guys, they’re a treasure trove of advice and usually know the best spots for bulk materials so you can save a little cash. Now, go take a walk outside and look at your yard with a fresh eye. Picture the possibilities and, if you found a spark of inspiration here, I’d love for you to share this with a friend who’s plotting their own backyard escape.
Leave a Comment