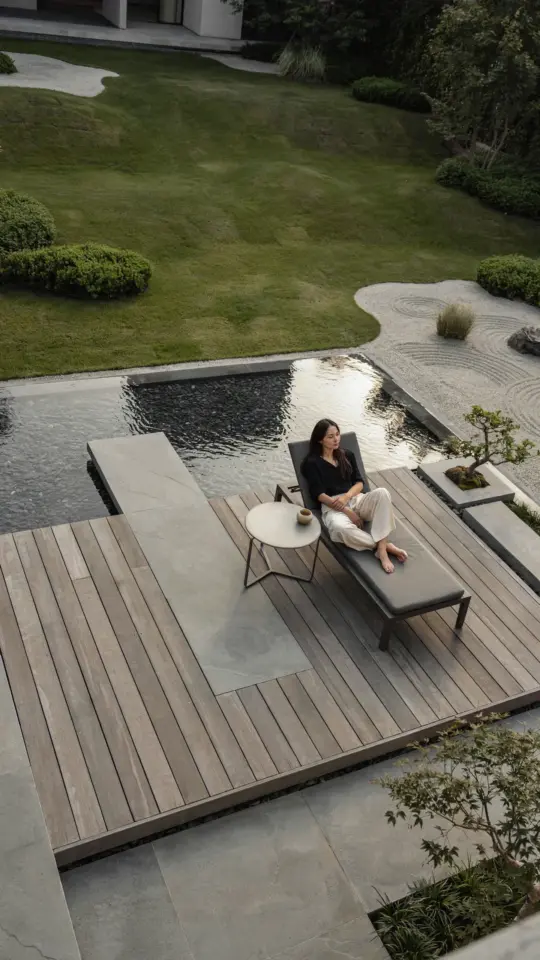
Look, I spent three summers staring at that patch of concrete around my pileta and wondering why it was just sitting there useless. Then I built a movable pool deck, or what some folks call a sliding deck, and honestly, it changed how the whole backyard works. You’ll see this trend popping up all over modern pool builds, and it’s not hard to see why. It turns a static piece of yard into something flexible, something you can actually use for dinner parties and reading sessions.
The magic is in the casters and the frame. If you have a rectangular pileta, you can build a floating wood platform that rolls back and forth. Treated lumber, a handful of brackets, and a weekend of your time will get you there. Not gonna lie, the first time I rolled my deck aside to jump in, I felt like a genius. Save this for your own pool build, because once you see how it works, you won’t want a permanent structure again.
Why a Rolling Platform Changes Your Small Backyard Pool
Most people with a small pileta make the same mistake. They build a fixed deck around the water, and then they wonder why the yard feels cramped and why there’s zero space for a grill or a lounge chair. A movable pool deck solves that by giving you two rooms in one. The deck covers the water when you need flat entertaining space, and you roll it back when the swim call gets too loud to ignore.
Here’s the thing, this isn’t just for looks. It’s a clever way to keep leaves and dirt out of the pool when the water isn’t in use. In the shoulder seasons, when the weather is mild but you’re not swimming daily, the deck serves as a patio. When July hits and the sun is brutal, you push it aside and expose the full length of the water.
Aside: My neighbor built a fixed wooden surround for his above-ground pool and now he has to squeeze past a giant planter to reach his filter. You don’t want that problem. The whole point of a sliding deck is that you can access every side of the pileta whenever you need to.
Best Materials for a DIY Sliding Deck That Lasts
You want this thing to sit outside in the rain, under the sun, and probably under a pile of wet towels. So the material choice matters a lot. I’m a big fan of treated pine for the frame because it’s cheap, it’s strong, and it handles moisture well. Pair that with cedar or composite decking boards for the top surface if you have the budget, but honestly, treated lumber works fine for the whole build if you’re on a tight timeline.
The brackets, use galvanized or stainless steel. Every single one. I know it’s tempting to grab whatever is on sale, but rusted brackets will ruin the whole project in a couple of seasons. And the wheels, look for heavy-duty swivel casters rated for at least 300 pounds each. A 6×6 foot deck is heavier than you think, especially when the wood soaks up some humidity.
Here’s a quick list of what I used, and what you should grab from the hardware store:
- 4×4 treated posts for the main perimeter framing.
- 2×4 treated lumber for the inner joists, spaced about 12 inches apart.
- Six swivel casters with brake locks, because nobody wants a runaway deck in a windstorm.
- Deck screws, specifically the coated kind made for outdoor use.
- Wood stain or sealant with UV protection.
The worst mistake you can make is skipping the sealant. I did that on a planter box once and it turned gray and splintery within a year. Just spend the extra afternoon on the sealing, your feet will thank you when you walk across it barefoot.
How Big Should Your Movable Pool Deck Be?
Size is where most people overthink themselves into a corner. The deck doesn’t need to cover the entire pool, and honestly, that would make it too heavy to roll. I built mine at eight feet long and four feet wide, which is perfect for two lounge chairs and a small side table. That’s enough to create a useful seating area without turning the build into an engineering crisis.
Measure the sides of your pileta and leave a gap of at least four inches between the deck frame and the pool edge. You need that gap for airflow and for minor misalignments. The rails you build for the deck to roll on need to extend beyond the pool edge by a couple of feet on both sides so the deck can roll completely off the water.
If you’re planning the layout, think about where the deck sits when the pool is open. That’s the spot that becomes your walkway, so make sure the casters have a clear path. Uneven pavers or dirt will make the deck stick, and that defeats the whole purpose. A level concrete or paver base is non-negotiable for smooth rolling.
Step-by-Step Plan for the Sliding Deck Frame and Rails
Start with the rails. Cut two long treated 2x4s that are longer than the pool’s width by at least four feet. These need to be secured to the ground or embedded into a paver base so they don’t shift when you roll the deck along them. Use heavy duty angle brackets to anchor these rails, and make sure they are dead level. Not almost level, dead level.
I used two rails, but if your pileta is large, three rails might be necessary. Just keep the spacing tight enough that the deck boards won’t sag. Here’s a number for you, my frame uses six casters, two on each rail. That distributes the weight evenly and prevents the middle of the deck from becoming a trampoline.
The frame itself is straightforward. Build a rectangle that fits between the outer edges of the rails, then screw the casters to the bottom of the frame. Flip it over, and you’ve got a cart that fits right onto the rails. The last step is screwing down the deck boards, leaving a quarter-inch gap between each board for water drainage. Do not skip the gap, the deck needs to shed rainwater, otherwise it becomes a puddle collection system.
Maintenance and Seasonal Care for Your Sliding Pileta Deck
The casters are the workhorses here, so they’ll need a little love. After each season, I hose them down and hit the bearings with a dry lubricant. The brake locks can get gunked up with grass clippings and debris, so watch for that. Treat the wood with a fresh coat of sealant every two years, or every year if you get heavy rain like I do in the coastal humidity.
During winter, it’s a good idea to position the deck closed over the pool if you use a pool cover. The added weight of the deck keeps the cover from flapping around. That’s a hidden benefit of the whole design, it acts as a weighted anchor. And if a storm is coming, just roll it off the pool entirely and lean it against the fence. It’s lightweight enough to move by yourself with a little effort.
Pro tip: Always open the deck before you drain the pool for the winter. The empty pit can’t support the wheels, and you don’t want to find that out the hard way. I almost learned that one the expensive way last October.
A Realistic Timeline for This Pool Deck Build
Set aside a full Saturday for the cutting and assembly. The project takes a solid six hours if you’re alone, but you can trim that to four with a friend helping you lift the frame. Most of the time gets eaten by measuring and re-measuring the rails. The pre-drilling of the joists takes time too, so don’t rush it.
Another weekend day will go toward staining and sealing the boards. Make sure the wood is completely dry before you roll the deck into place. Damp wood is a trap, it swells, the boards shift, and your beautiful flat surface turns into a warped mess. Wait for the sealant to cure for at least 24 hours before you stand on it.
The great thing about this build is that it doesn’t require any specialized tools. A circular saw, a cordless drill, and a measuring tape cover almost everything. I used a speed square for the cuts and a rubber mallet to nudge the boards into alignment. You don’t need a workshop full of equipment for this one.
Is a Movable Pool Deck Worth It for Your Pool Build?
If you have a pool that you use maybe four months a year, this is the smartest purchase you can make. But if you live somewhere with year-round swimming season, maybe invest that money into a permanent paver patio instead. The movable deck adds versatility, but you’ll pay a small premium for the casters and the heavy duty hardware.
For myself, the moment I knew it was worth it was during a backyard barbecue in late spring. The pool was too cold to swim, but the deck gave us a dry place to set up the buffet table. Then by mid-summer, the deck was rolled aside and the pool was the centerpiece. One structure, two totally different backyards.
So before you pour a permanent concrete slab or nail down a stationary wood frame, think about what you want from your yard all year long. The sliding deck is the answer for those of us with limited space and a love for both swimming and hosting. Give it a try this weekend, and save this guide for reference. Your pool build will be better for it.
Leave a Comment